
Camping in the fall feels even more magical with outdoor cooking that is pure comfort food heaven.
The crisp air sort of enhances the flavors of everything from that first sip of hot coffee to hearty stews that simmer over crackling flames.
No need for fancy equipment or complicated recipes. Smart meal choices and a few essential tools can turn any campsite into the coziest kitchen imaginable.
I am sharing some of my fave cozy fall camping food ideas.
Autumn Camping Food Essential Tools
Fall camping brings cooler weather and heartier meals, which means you’ll need the right tools to cook up those warming comfort foods.
These essential items will help you create delicious autumn camping meals without the stress of missing equipment.
- Cast Iron Skillet
Perfect for cooking everything from breakfast hash to skillet cornbread over the campfire.
- Dutch Oven
Essential for making hearty fall stews, chili and even baking bread at your campsite.
- Coffee Percolator
Nothing beats hot coffee on a crisp fall morning when you’re camping outdoors.
- Long-Handle Cooking Utensils
Keep your hands safe from the fire while stirring soups and flipping food.
- Quality Cooler
Fall weather helps keep food cold longer but you still need good insulation for safety.
- LED Lantern
Fall means shorter days so you’ll need reliable lighting for cooking dinner and cleanup.
Fall Camp Meal Ideas
Now that you’ve got your camping kitchen sorted, let’s talk about the meals that’ll make your taste buds do a happy dance around the campfire!
I’m sharing some of my absolute favorite fall recipes that practically scream autumn – from a hearty pumpkin chili that’s basically a warm hug in a bowl to maple glazed acorn squash that’s so good you’ll forget you’re camping and not at a fancy restaurant.
These dishes aren’t just delicious, they’re also perfect for feeding hungry campers who’ve worked up an appetite hiking through those gorgeous fall leaves.
Hearty Pumpkin Chili Recipe
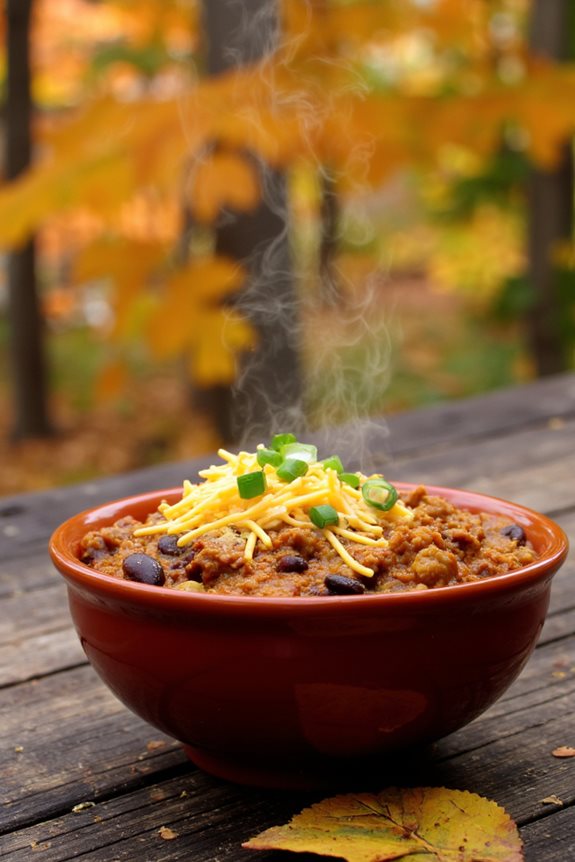
This hearty chili is packed with veggies and spice, and the pumpkin gives it a rich, slightly sweet finish. It’s warming, filling and perfect for cold nights at camp.
Ingredients:
- 1 pound ground turkey or beef
- 1 can (15 oz) pumpkin puree
- 1 can (14.5 oz) diced tomatoes
- 2 cans (15 oz each) kidney beans, drained and rinsed
- 1 large onion, diced
- 3 cloves garlic, minced
- 2 cups beef or vegetable broth
- 2 tablespoons olive oil
- 2 teaspoons chili powder
- 1 teaspoon cumin
- 1 teaspoon paprika
- 1/2 teaspoon cinnamon
- Salt and pepper to taste
- Optional toppings: shredded cheese, sour cream, chopped green onions
Instructions:
- Heat olive oil in a large pot or Dutch oven over medium heat. Add the diced onion and cook for about 5 minutes until it starts getting soft and fragrant.
- Add the minced garlic and cook for another minute, stirring constantly so it doesn’t burn.
- Add the ground meat and cook until it’s browned all over, breaking it up with a spoon as it cooks.
- Stir in all the spices (chili powder, cumin, paprika and cinnamon) and cook for about 30 seconds until they smell amazing.
- Add the pumpkin puree, diced tomatoes, kidney beans and broth. Stir everything together really well.
- Bring the mixture to a boil, then reduce heat to low and let it simmer for at least 20 minutes, stirring occasionally.
- Season with salt and pepper to taste, and serve hot with your favorite toppings!
Maple Glazed Acorn Squash
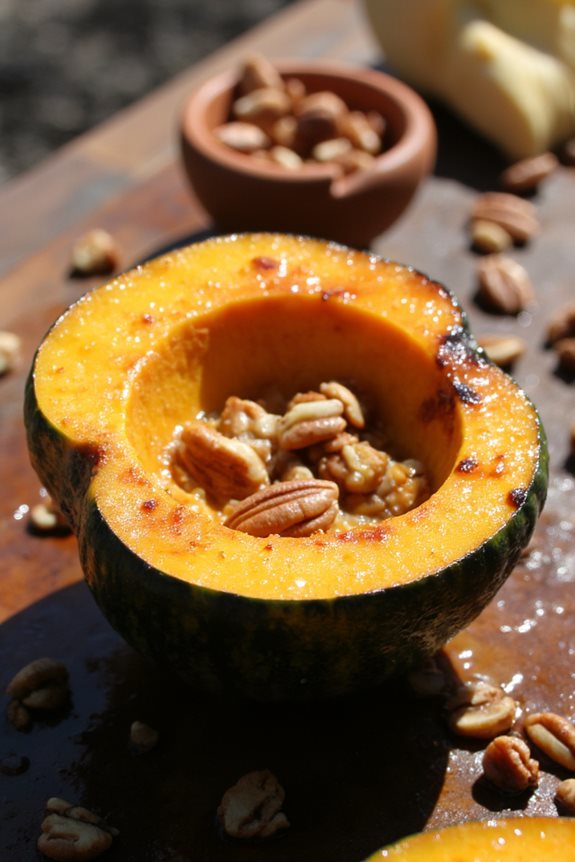
This glazed squash hits that sweet-savory spot with maple, butter and spice. It feels fancy but it’s simple enough for any fire-side cook.
Ingredients:
- 2 medium acorn squashes, halved and seeded
- 1/4 cup pure maple syrup
- 3 tablespoons butter, melted
- 1 teaspoon cinnamon
- 1/2 teaspoon nutmeg
- 1/2 teaspoon salt
- 1/4 teaspoon black pepper
- 2 tablespoons brown sugar
- 1/4 cup chopped pecans (optional)
Instructions:
- Preheat your camp oven or set up your campfire with good coals for indirect cooking at around 400°F.
- Cut the acorn squashes in half lengthwise and scoop out all the seeds and stringy bits with a spoon.
- Score the flesh of each squash half in a crosshatch pattern, making cuts about 1/2 inch deep.
- In a small bowl, whisk together the maple syrup, melted butter, cinnamon, nutmeg, salt, pepper and brown sugar until it’s all combined.
- Brush the maple mixture generously over the cut surfaces of the squash halves, making sure it gets into those scored lines.
- Place the squash halves cut-side up in a cast iron Dutch oven or on a camping grill grate.
- Cook for 35-45 minutes until the flesh is tender when you poke it with a fork and the edges are getting nicely caramelized.
- Sprinkle with chopped pecans in the last 5 minutes of cooking if you’re using them, and serve hot while everyone’s still gathered around the fire.
Apple Cider Braised Pork
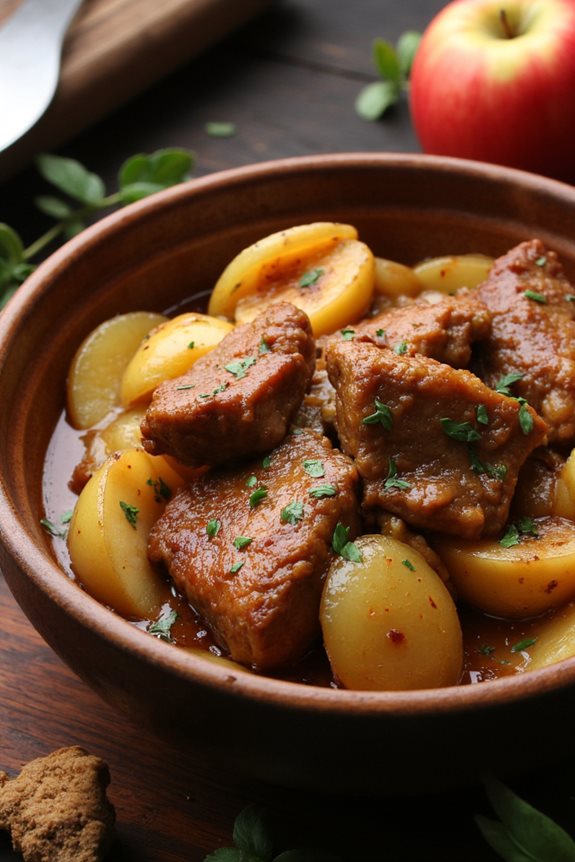
Pork and apple cider were made for each other. This braise comes together in one pot and fills the campsite with serious cozy energy.
Ingredients:
- 2 pounds pork shoulder, cut into chunks
- 2 cups apple cider
- 2 large apples, sliced
- 1 large onion, sliced
- 3 cloves garlic, minced
- 2 tablespoons olive oil
- 2 tablespoons brown sugar
- 1 teaspoon dried thyme
- 1 teaspoon ground cinnamon
- Salt and pepper to taste
- 2 bay leaves
Instructions:
- Heat the olive oil in a large Dutch oven or heavy pot over medium-high heat. Season the pork chunks with salt and pepper, then brown them on all sides for about 6-8 minutes total.
- Remove the pork and set it aside. In the same pot, add the sliced onion and cook until it starts getting soft and golden, about 5 minutes.
- Add the minced garlic, thyme and cinnamon, stirring for about 30 seconds until it smells amazing.
- Pour in the apple cider and scrape up any brown bits from the bottom of the pot because that’s where all the flavor lives!
- Return the pork to the pot and add the brown sugar, bay leaves and sliced apples. Bring everything to a boil.
- Reduce the heat to low, cover the pot and let it simmer for about 1.5 to 2 hours until the pork is tender enough to cut with a fork.
- Remove the bay leaves, taste and adjust seasoning as needed. Serve hot and watch everyone’s faces light up!
Campfire Sweet Potato Foil Packs
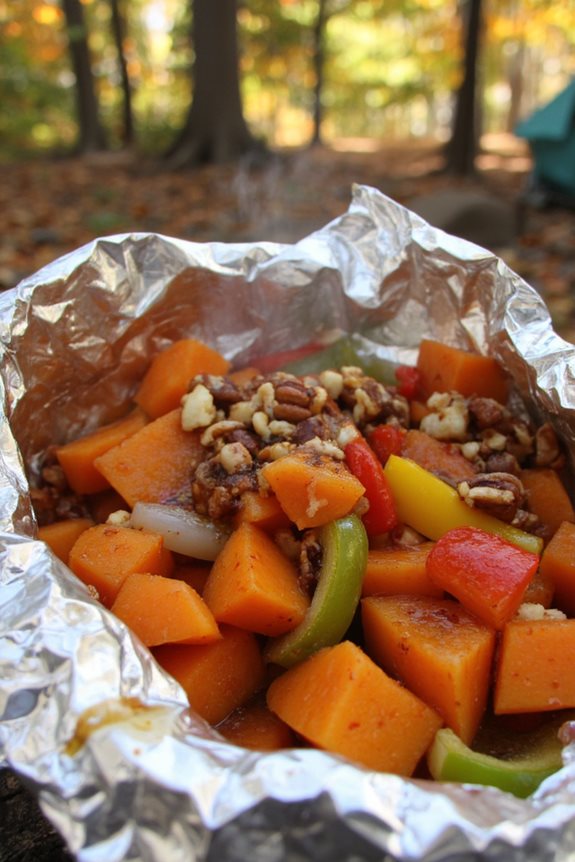
These foil packs are all about low-effort, high-reward flavor. Just toss everything in and let the fire do the work while you relax.
Ingredients:
- 4 medium sweet potatoes, scrubbed and diced into 1-inch cubes
- 2 tablespoons olive oil
- 1 large onion, sliced
- 1 bell pepper, chopped
- 2 cloves garlic, minced
- 1 teaspoon smoked paprika
- 1/2 teaspoon cinnamon
- 1/2 teaspoon salt
- 1/4 teaspoon black pepper
- 2 tablespoons brown sugar
- 1/4 cup chopped pecans (optional)
- Heavy-duty aluminum foil
Instructions:
- Tear off four large pieces of heavy-duty foil, about 12 inches each, and lay them flat on your prep surface.
- In a large bowl, toss the diced sweet potatoes with olive oil, minced garlic, smoked paprika, cinnamon, salt, pepper and brown sugar until everything’s well coated.
- Divide the seasoned sweet potato mixture evenly among the four foil pieces, placing it in the center of each sheet.
- Top each portion with sliced onions, chopped bell pepper and pecans if you’re using them.
- Fold the foil over the ingredients and crimp the edges tightly to create sealed packets, making sure there’s no gaps for steam to escape.
- Place the foil packs directly on hot coals or on a grate over medium campfire heat for 20-25 minutes.
- Carefully flip the packets halfway through cooking using long tongs or a spatula.
- Remove from heat and let cool for 2-3 minutes before carefully opening the foil packs, watching out for that hot steam that’ll try to give you a surprise facial!
Cranberry Pecan Stuffed Chicken
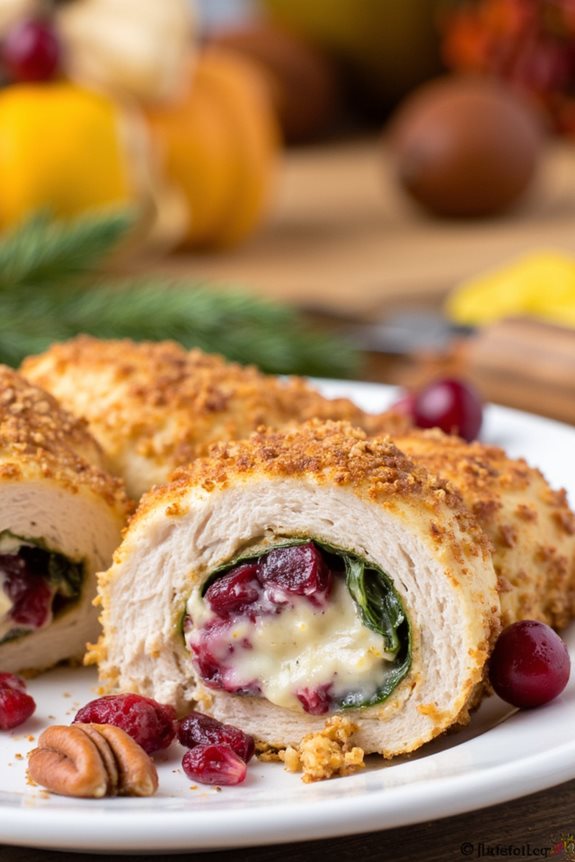
This stuffed chicken tastes like the holidays in the best way. It’s easy to prep ahead and makes your camp dinner feel a little more elevated.
Ingredients:
- 4 boneless chicken breasts
- 1/2 cup dried cranberries
- 1/2 cup chopped pecans
- 1/4 cup cream cheese, softened
- 2 tablespoons honey
- 1 teaspoon dried sage
- 1/2 teaspoon garlic powder
- 2 tablespoons olive oil
- Salt and pepper to taste
- Toothpicks for securing
Instructions:
- Mix the cranberries, pecans, cream cheese, honey, sage and garlic powder in a bowl until it’s all combined and looking pretty tasty.
- Cut a pocket into each chicken breast by slicing horizontally about 3/4 of the way through… be careful not to go all the way or your stuffing will make a great escape!
- Season both sides of the chicken with salt and pepper, then stuff each pocket with the cranberry mixture and secure with toothpicks.
- Heat olive oil in your camp skillet over medium heat and cook the chicken for about 6-7 minutes on each side until it’s golden brown and cooked through.
- Let the chicken rest for a few minutes before serving so all those delicious juices stay put instead of running all over your plate.
Spiced Butternut Squash Soup
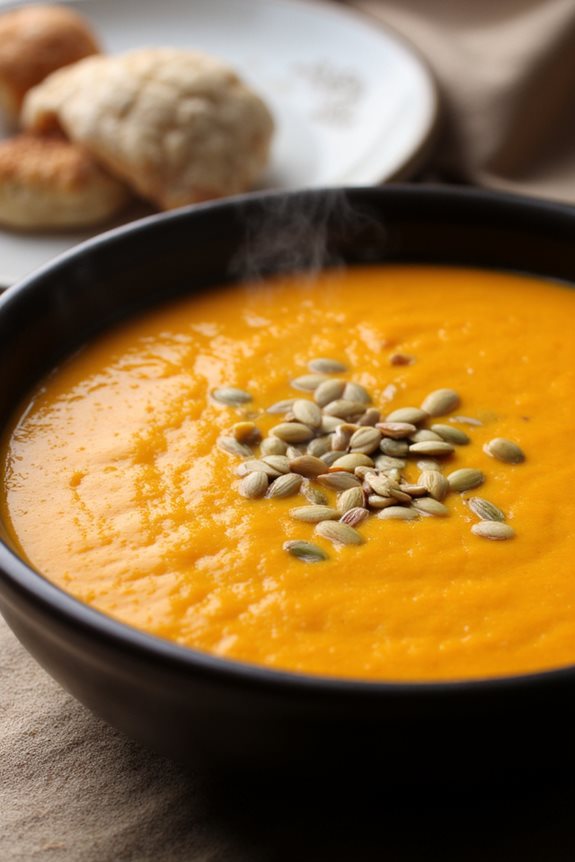
This soup is creamy, gently spiced and ideal for warming up after a hike. You can prep most of it before your trip so it’s low-stress at camp.
Ingredients:
- 3 pounds butternut squash, peeled and cubed
- 4 cups vegetable or chicken broth
- 1 large onion, diced
- 2 apples, peeled and chopped
- 3 cloves garlic, minced
- 2 tablespoons olive oil
- 1 teaspoon ground cinnamon
- 1/2 teaspoon ground nutmeg
- 1/4 teaspoon ground ginger
- 1/2 cup coconut milk or heavy cream
- Salt and pepper to taste
- Pumpkin seeds for garnish (optional)
Instructions:
- Heat olive oil in a large camping pot over medium heat. Add the diced onion and cook for about 5 minutes until it gets soft and fragrant.
- Toss in the minced garlic and cook for another minute, stirring so it doesn’t burn.
- Add the cubed butternut squash and chopped apples to the pot, then sprinkle in all your spices.
- Pour in the broth and bring everything to a boil. Once it’s bubbling, reduce the heat and let it simmer for 25-30 minutes until the squash is fork-tender.
- Remove the pot from heat and carefully blend the soup using an immersion blender, or transfer in batches to a regular blender if that’s what you brought.
- Stir in the coconut milk or cream, then season with salt and pepper to taste.
- Serve hot with pumpkin seeds on top if you want to get fancy, and enjoy your liquid autumn in a bowl!
Cinnamon Apple Dutch Oven Cobbler
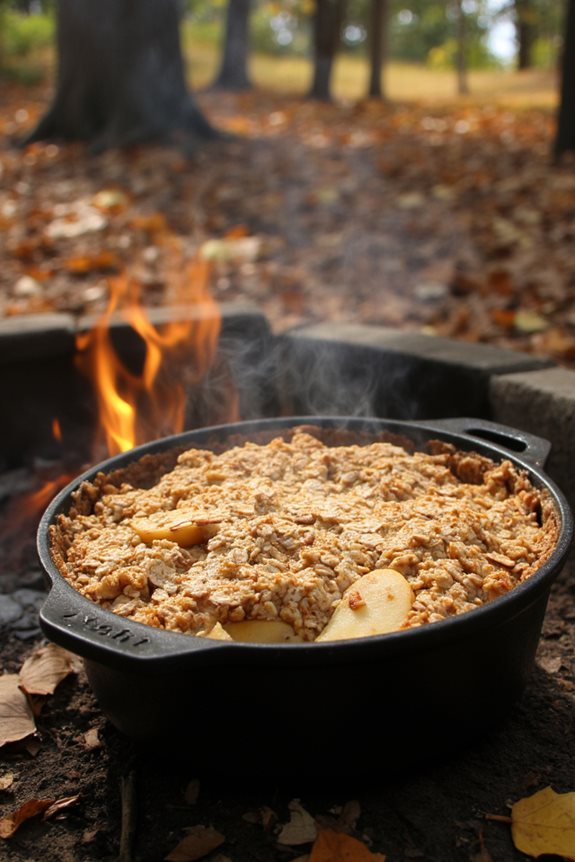
Warm apples, cinnamon and a buttery topping come together in your Dutch oven for a dessert that feels like fall wrapped in a blanket.
Ingredients:
- 6 large apples, peeled and sliced (Granny Smith or Honeycrisp work great)
- 1 cup all-purpose flour
- 1 cup rolled oats
- 3/4 cup brown sugar
- 1/2 cup cold butter, cubed
- 2 teaspoons cinnamon
- 1/2 teaspoon nutmeg
- 1/4 teaspoon salt
- 1/4 cup maple syrup
- 2 tablespoons lemon juice
- Vanilla ice cream for serving (if you can keep it cold!)
Instructions:
- Get your campfire going and let it burn down to nice, steady coals. You want consistent heat, not roaring flames that’ll turn your cobbler into charcoal.
- Grease your Dutch oven with a little butter or cooking spray so nothing sticks to the bottom.
- Toss the sliced apples with lemon juice, maple syrup, 1 teaspoon cinnamon and a pinch of salt in a large bowl. Let them sit for a few minutes to get all juicy.
- In another bowl, mix the flour, oats, brown sugar, remaining cinnamon, nutmeg and salt. Cut in the cold butter with a fork or your fingers until the mixture looks like chunky breadcrumbs.
- Layer the seasoned apples in the bottom of your Dutch oven, then sprinkle the oat mixture evenly over the top.
- Cover with the lid and place on the coals. Put about 8-10 coals underneath and 14-16 coals on top of the lid for even baking.
- Bake for about 35-40 minutes, rotating the pot and lid every 10 minutes so it cooks evenly. You’ll know it’s done when the top is golden brown and you can hear it bubbling.
- Let it cool for about 10 minutes before serving… trust me, molten apple filling is no joke! Serve with ice cream if you’ve got it.
Sage Roasted Turkey Breast
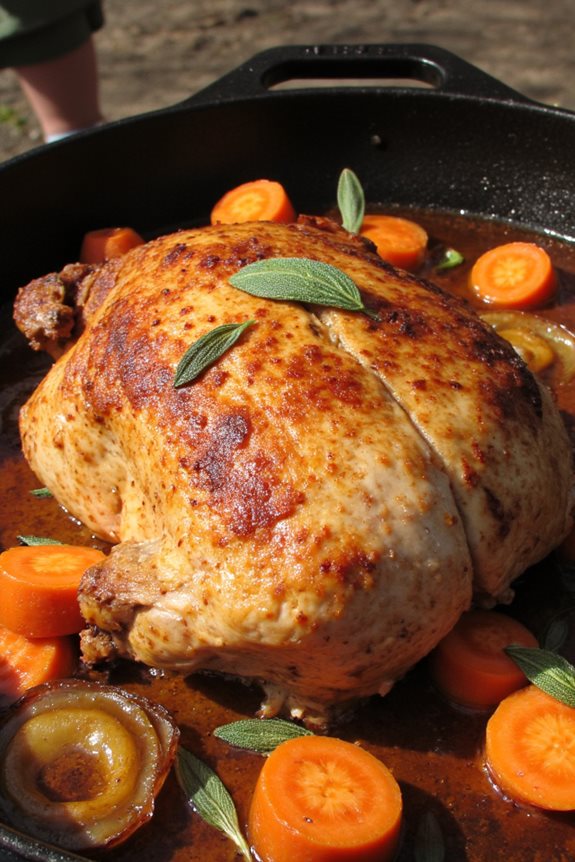
No full turkey needed here. This roasted breast with fresh sage gives you all the flavor and none of the fuss.
Ingredients:
- 3-4 lb bone-in turkey breast
- 3 tablespoons fresh sage leaves, chopped
- 4 tablespoons butter, softened
- 3 cloves garlic, minced
- 2 tablespoons olive oil
- 1 large onion, sliced thick
- 2 carrots, cut into chunks
- Salt and black pepper
- 1 cup chicken broth
- Aluminum foil
Instructions:
- Mix the softened butter with chopped sage, minced garlic and a good pinch of salt and pepper in a small bowl.
- Pat the turkey breast completely dry with paper towels, then carefully loosen the skin and spread half the sage butter mixture directly on the meat under the skin.
- Rub the remaining sage butter all over the outside of the turkey breast and season generously with salt and pepper.
- Heat olive oil in a large cast iron Dutch oven or heavy pot over your camp stove or fire, then sear the turkey breast skin-side down until golden brown, about 5-6 minutes.
- Flip the turkey and sear the other side for another 4-5 minutes until nicely browned all over.
- Remove turkey and add the sliced onions and carrots to the same pot, cooking until they start to soften and get some color.
- Place the turkey back on top of the vegetables, pour the chicken broth around (not over) the turkey, and cover tightly with foil then the pot lid.
- Cook over medium coals or low heat for about 1 hour to 1 hour 15 minutes until the internal temperature reaches 165°F in the thickest part.
- Let the turkey rest for 10 minutes before slicing, and don’t forget to spoon those amazing pan juices over everything!
Bacon Wrapped Stuffed Mushrooms
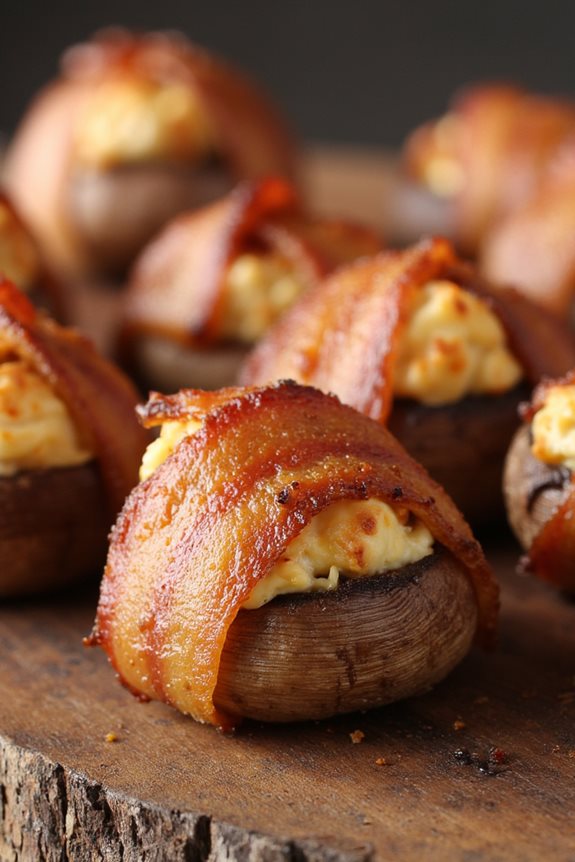
These little bites deliver big flavor with creamy filling and crispy bacon. Make them ahead and toss them on the grill when hunger hits.
Ingredients:
- 12 large button or baby bella mushrooms, stems removed
- 12 strips bacon
- 4 oz cream cheese, softened
- 1/2 cup breadcrumbs
- 1/4 cup green onions, chopped
- 2 cloves garlic, minced
- 1/4 cup grated parmesan cheese
- 2 tablespoons fresh thyme (or 1 tablespoon dried)
- Salt and pepper to taste
- Toothpicks for securing
Instructions:
- Clean the mushrooms and remove stems, then chop up those stems finely because we’re not wasting anything good around here!
- In a bowl, mix together the cream cheese, chopped mushroom stems, breadcrumbs, green onions, garlic, parmesan cheese and thyme until everything’s nicely combined.
- Season your mixture with salt and pepper, then stuff each mushroom cap generously with the filling.
- Wrap each stuffed mushroom with a strip of bacon, securing it with a toothpick so it doesn’t unravel during cooking.
- Place them on a grill grate over medium campfire coals or on your camp grill, cooking for about 15-20 minutes until the bacon is crispy and the mushrooms are tender.
- Let them cool for just a few minutes before serving because that filling gets super hot and nobody wants to burn their tongue on the first bite!
Honey Glazed Carrots Skillet
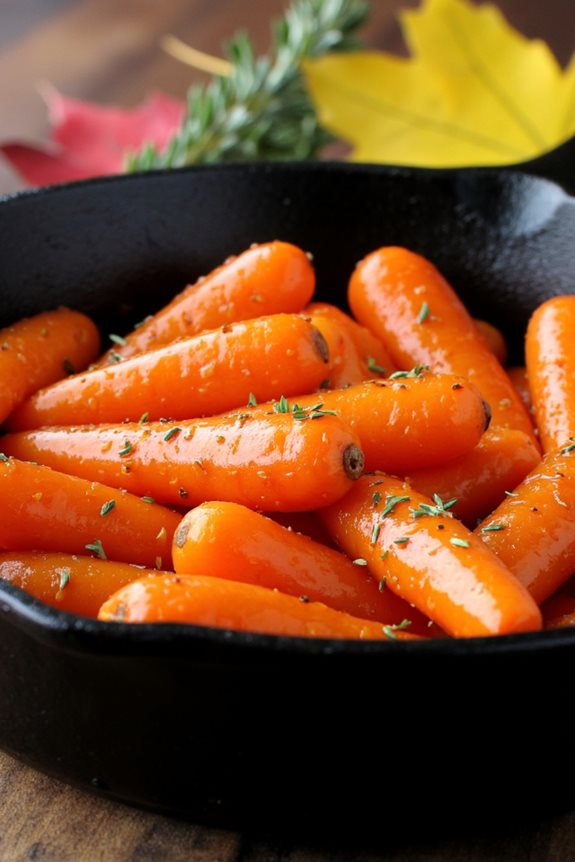
These carrots are sweet, sticky and totally camp-ready. One skillet is all you need to make them shine.
Ingredients:
- 2 pounds baby carrots (or regular carrots cut into sticks)
- 3 tablespoons butter
- 1/4 cup honey
- 2 tablespoons brown sugar
- 1/2 teaspoon salt
- 1/4 teaspoon black pepper
- 1/2 teaspoon garlic powder
- 2 tablespoons fresh thyme (or 1 teaspoon dried)
- 1/4 cup water
Instructions:
- Heat your cast iron skillet over medium heat and melt the butter until it’s bubbling and smells amazing.
- Toss in the carrots and cook them for about 5-7 minutes, stirring occasionally so they get a nice golden color on all sides.
- Mix the honey, brown sugar, salt, pepper and garlic powder in a small bowl… this is where the magic happens!
- Pour the honey mixture over the carrots and add the water to help create that gorgeous glaze.
- Cover the skillet and let everything simmer for 10-12 minutes until the carrots are tender when you poke them with a fork.
- Remove the lid and crank up the heat to medium-high for the last 2-3 minutes to let that glaze get thick and sticky.
- Sprinkle with fresh thyme and give everything one final stir before serving up this fall masterpiece!
Pumpkin Spice Campfire Bread
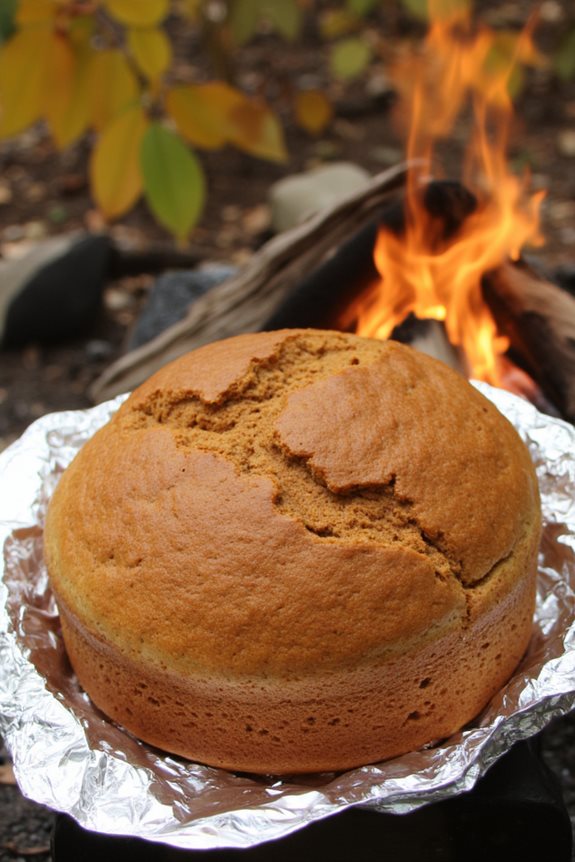
This spiced bread bakes up right in the coals and smells like every cozy thing about fall mornings rolled into one.
Ingredients:
- 2 cups all-purpose flour
- 1 cup pumpkin puree
- 1/2 cup brown sugar
- 1/4 cup melted butter
- 2 eggs
- 1 teaspoon baking soda
- 1 teaspoon cinnamon
- 1/2 teaspoon nutmeg
- 1/2 teaspoon ground ginger
- 1/4 teaspoon cloves
- 1/2 teaspoon salt
- 1/3 cup milk
- Heavy-duty aluminum foil
Instructions:
- Get your campfire going and let it burn down to nice hot coals… you want steady heat, not crazy flames.
- In a large bowl, mix together the flour, baking soda, cinnamon, nutmeg, ginger, cloves and salt.
- In another bowl, whisk together the pumpkin puree, brown sugar, melted butter, eggs and milk until it’s nice and smooth.
- Pour the wet ingredients into the dry ingredients and stir until just combined. Don’t overmix it or you’ll end up with tough bread!
- Tear off a large piece of heavy-duty foil and grease it well with butter or cooking spray.
- Shape the dough into a loaf on the foil, then wrap it up tight, leaving some room for the bread to expand.
- Place the wrapped loaf on the hot coals and cover with more coals on top, creating an oven effect.
- Cook for about 45-60 minutes, rotating the package every 15 minutes to ensure even cooking.
- Carefully unwrap and check doneness by inserting a knife… it should come out clean when it’s ready.
Caramelized Onion Grilled Cheese
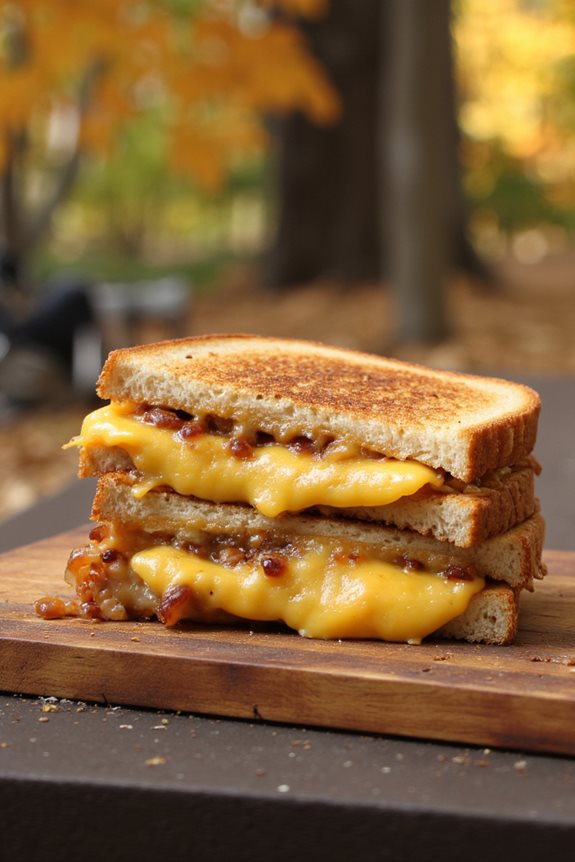
The onions get golden and sweet, the bread gets crisp and buttery and the cheese melts just right. Classic comfort food, campfire style.
Ingredients:
- 2 large onions, thinly sliced
- 8 slices of bread (sourdough or whole grain work great)
- 8 slices of cheese (cheddar, gruyere or swiss)
- 4 tablespoons butter
- 2 tablespoons olive oil
- 1 teaspoon brown sugar
- 1/2 teaspoon salt
- 1/4 teaspoon black pepper
- Optional: fresh thyme leaves
Instructions:
- Heat olive oil in a large skillet over medium-low heat and add the sliced onions with salt and pepper.
- Cook the onions slowly, stirring occasionally, for about 20-25 minutes until they turn golden brown and sweet. Add brown sugar in the last 5 minutes to help with caramelization.
- While onions are cooking, butter one side of each bread slice generously.
- Place bread butter-side down in a clean skillet and layer cheese on top, then add a generous spoonful of caramelized onions.
- Top with another slice of bread, butter-side up, and cook over medium heat for 3-4 minutes until golden brown.
- Flip carefully and cook another 3-4 minutes until the second side is golden and cheese is completely melted.
- Let cool for a minute or two before cutting… trust me, that cheese is molten lava hot and you don’t want to burn your tongue on the first bite!
Fall Camping Food
These recipes aren’t just meals, their memories waiting to happen around the crackling fire.
Nothing beats the smell of maple glazed squash mixing with woodsmoke while your friends gather close for warmth.
Pack that cast iron, embrace the autumn flavors and get ready for some seriously cozy camping adventures ahead!